📌 Required Permissions:
Receivables → Set up and manage invoice workflows, automations
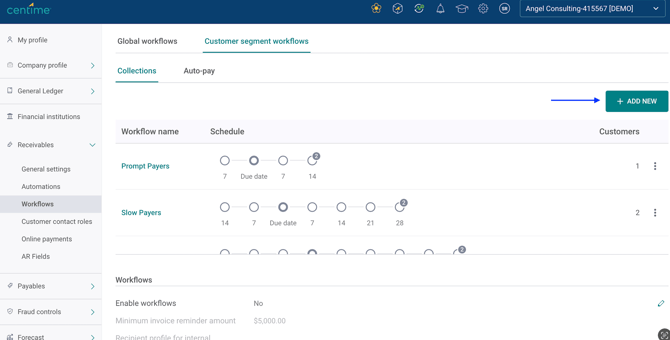
🛠️ How to Create a Customer-Level Workflow
🔍 Navigation: Settings > Receivables > Workflows > Customer Segment Workflows
🆕 Creating a Workflow
-
Click + ADD NEW

-
In the Campaign Type dropdown, select Customer Level.
📅 Configuring Frequency

Choose when the workflow should run:
-
Weekly / Bi-weekly: Select the day of the week.
-
Monthly: Choose the week and day of the month.
⚙️ Defining Actions
When setting up a customer-level workflow, you must select a campaign type — either:
-
Reminder Email – To send automated reminders to customers about unpaid invoices.
-
Internal Notification – To notify internal teams about invoice statuses or updates.

Once a campaign type is selected, click Save to enable template editing. After saving, you can customize the messaging using the Manage Template button to edit the statement or notification template.
➕ Recipients
Recipients are determined based on the Communication Contact role type associated with the customer.
🎯 Applying Conditions (Optional)

Conditions control when an action is triggered based on receivables data, they allow you to limit when a Customer workflow is triggered.
Available Conditions:
-
Outstanding
-
Overdue
-
Overdue %
-
Consolidated Outstanding
-
Consolidated Overdue
-
Consolidated Overdue %
Operators:
-
Greater than or equal to
-
Less than
Value: Set the desired threshold in the customer's home currency.
📝 Tracking and History
Triggered actions are logged in the Customer History, allowing you to view:
-
Date: When the action occurred
-
Action: Type of action (e.g., reminder sent, internal notification)
-
Description: Details, including the conditions that were met
These actions are also visible in the Customers and Unpaid Invoices tabs via the following columns:
-
Last Action – The most recent action taken
-
Last Action By – The user who triggered the action
-
Last Action Date – The date the action occurred
🤖 Adding Automations

You can include up to 100 automations in a single customer-level workflow.
To add an automation:
-
Open the Automation dropdown.
-
Select the automation you want to include.
For more information, refer to: