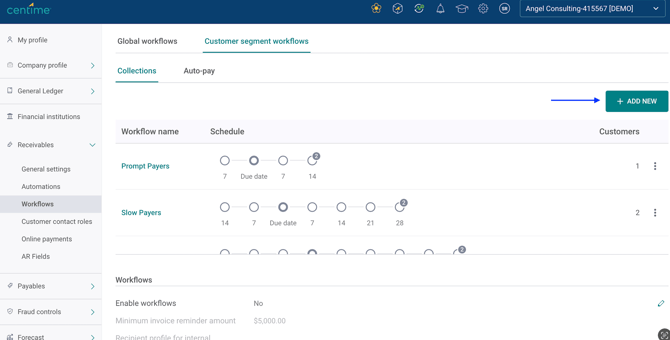
Setting Up Customer-Level Workflows
Customer-level workflows help automate collections communication based on customer behavior and segmentation. These workflows allow you to send reminder emails, notify internal teams, and apply custom conditions to improve the efficiency of your receivables process.
📌 Required Permissions:
Receivables → Set up and manage invoice workflows, automations
🛠️ How to Create a Customer-Level Workflow
🔍 Navigation: Settings > Receivables > Workflows > Customer Segment Workflows
🆕 Creating a Workflow

-
Click + ADD NEW

-
In the Campaign Type dropdown, select Customer Level.
📅 Configuring Frequency

Choose when the workflow should run:
-
Weekly / Bi-weekly: Select the day of the week.
-
Monthly: Choose the week and day of the month.
⚙️ Defining Actions
When setting up a customer-level workflow, you must select a campaign type — either:
-
Reminder Email – To send automated reminders to customers about unpaid invoices.
-
Internal Notification – To notify internal teams about invoice statuses or updates.

Once a campaign type is selected, click Save to enable template editing. After saving, you can customize the messaging using the Manage Template button to edit the statement or notification template.
➕ Recipients
Recipients are determined based on the Communication Contact role type associated with the customer.
🎯 Applying Conditions (Optional)

Conditions control when an action is triggered based on receivables data, they allow you to limit when a Customer workflow is triggered.
Available Conditions:
-
Outstanding
-
Overdue
-
Overdue %
-
Consolidated Outstanding
-
Consolidated Overdue
-
Consolidated Overdue %
Operators:
-
Greater than or equal to
-
Less than
Value: Set the desired threshold in the customer's home currency.
📝 Tracking and History
Triggered actions are logged in the Customer History, allowing you to view:
-
Date: When the action occurred
-
Action: Type of action (e.g., reminder sent, internal notification)
-
Description: Details, including the conditions that were met
These actions are also visible in the Customers and Unpaid Invoices tabs via the following columns:
-
Last Action – The most recent action taken
-
Last Action By – The user who triggered the action
-
Last Action Date – The date the action occurred
🤖 Adding Automations

You can include up to 100 automations in a single customer-level workflow.
To add an automation:
-
Open the Automation dropdown.
-
Select the automation you want to include.
For more information, refer to: