
The Enhanced Task Management feature (Release 3.2.0) improves collaboration and visibility for AR and AP teams by making tasks easier to manage throughout their lifecycle.
Previously, tasks could only be assigned once, notes could not be added without overwriting existing information, and there was limited visibility into ownership or activity history. This enhancement introduces collaborative task management, allowing multiple team members to participate while maintaining a complete audit trail.
Accessing Tasks
The Notifications Panel serves as your main Task Manager in Centime:
-
🔔 Click the notifications icon in the header bar.
-
Navigate to the Tasks tab in the Tasks and Notifications panel to manage all your active tasks and view archived tasks as well.
In addition to the Task Manager, you can also access tasks from other parts of the platform:
-
📊 Tables in AR Module: View and manage tasks linked to specific records directly within the Accounts Receivable (AR) tables.
-
📄 Document Viewer (Payables Module): Within the Payables module, navigate to the Document tab to view or create tasks related specifically to an invoice or document.
Creating a New Task
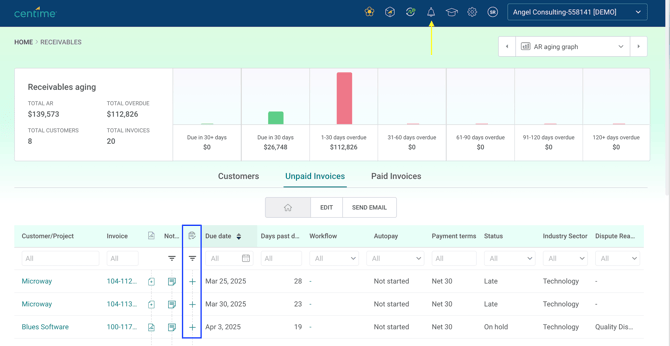
Tasks can be created in two ways:
-
From the Task Manager: Click on the ➕ Add a new task button in the Tasks tab.
-
From the AR Tables: Tasks created from these tables will automatically be pre-filled with solution, customer and invoice details for convenience.
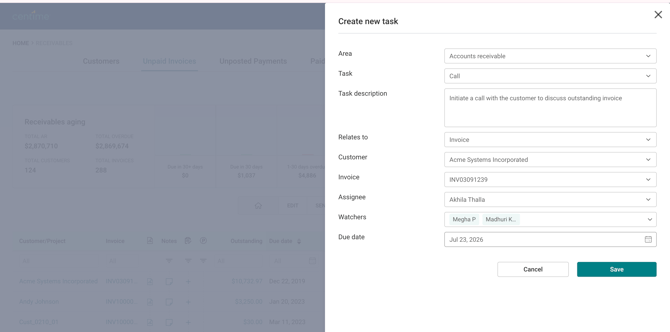
Creating a TaskWhen creating a task, provide the following information:
Field Description Area Accounts Receivable or Accounts Payable Task Select an existing task template or create a new one Task Description Describe the work that needs to be completed. Relates To Associate the task with a Customer, Invoice, Supplier, or Document. Due Date Select the target completion date. Assignee Select the user responsible for completing the task. Watchers Add one or more users who should be kept informed of task activity. Click Save to create the task.
Note: Multiple watchers can be added to a task.
Managing Tasks
Selecting a task present on an Invoice/Customer opens the Tasks & Notifications side-panel view with all task details where you can manage and update it throughout its lifecycle.
The creator of the task can update:
- Assignee
- Due Date
- Watchers
- Status
- Comments
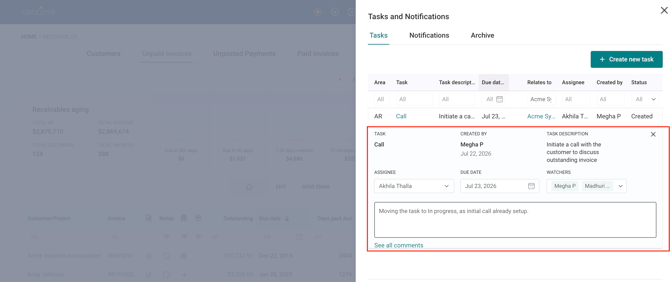
All significant updates are recorded in the task's activity history.
Task Status
Tasks progress through the following statuses:
- Created (i.e newly created tasks)
- In Progress
- On Hold
- Completed (Mark complete checkbox - earlier)
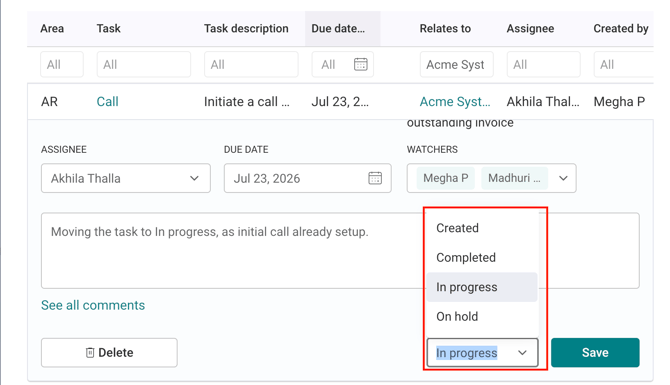
Updating the task status helps teams quickly understand the current stage of work.
Task Comments
Comments provide an ongoing conversation and context for the task.
Unlike previous versions, comments no longer overwrite existing notes. Every comment is preserved and displayed chronologically.
Comments can be used to document:
- Customer conversations
- Investigation findings
- Internal discussions
- Progress updates
- Resolution details
Required Comments for Task Updates
To maintain a complete audit trail, certain task changes require a comment explaining the reason for the update.
A comment is required when:
- Reassigning a task
- Changing the due date
- Updating the task status
- Making significant task updates
These comments provide context for other team members and create a historical audit trail
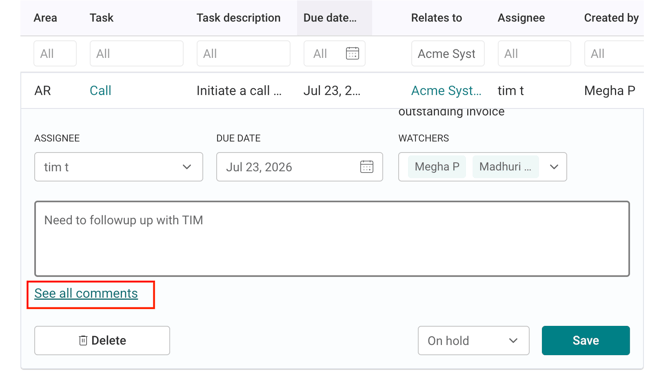
Once the comment is added, click on Save.
Viewing Task Activity
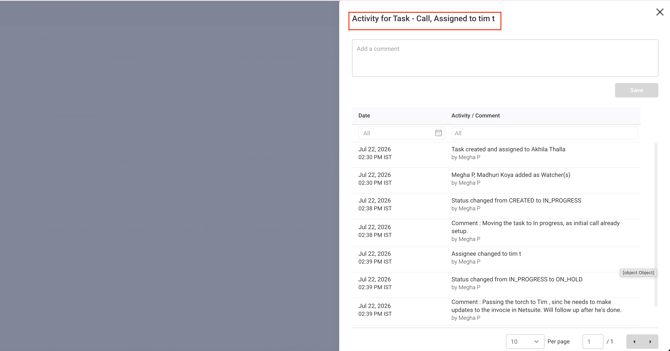
Click See all comments from the task details to open the Task Activity window.
The Task Activity page displays:
- All task comments
- Date and time of each update
- User who performed each action
- Complete chronological activity history.
This provides a full audit trail of the task from creation through completion.
Reassigning Tasks
Tasks can be reassigned whenever ownership changes.
When a task is reassigned:
- The selected user becomes the new assignee.
- Existing watchers remain on the task unless removed.
- The reassignment is recorded in the activity history.
- A comment explaining the reassignment is required.
Completing a Task
When work is finished:
- Open the task.
- Change the status to Completed.
- Add a completion comment.
- Click Save.
Completed tasks are automatically moved to the Archive tab.
Archived Tasks
The Archive tab contains all completed tasks.
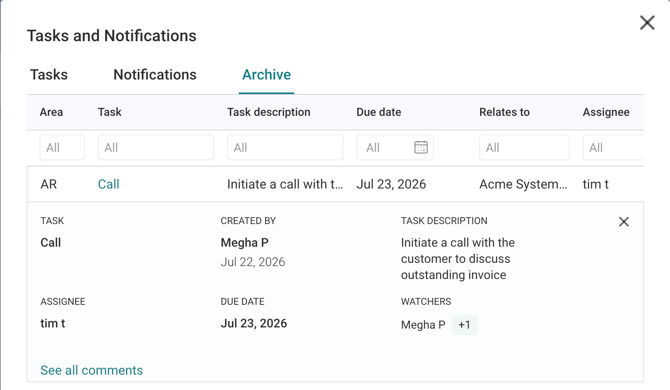
Archived tasks:
- Are available for reference.
- Retain their complete activity history.
- Preserve every comment and update.
- Cannot be modified.
Deleted tasks are not archived.
Managing Task Templates
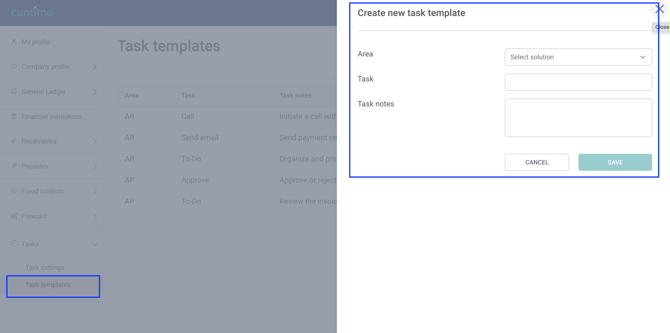
Task templates are reusable formats for common tasks, perfect for saving time.
Templates can be managed in two places:
-
From the task creation screen:
-
From the Task dropdown, click ➕ Add new task template.
-
Name your template and add any optional notes.
-
Save it. It will now be available for quick selection in the task creation dropdown. 💡
-
-
From Settings: Navigate to Settings > Tasks > Task Template to manage and create templates centrally.
-
Click ➕ Add new task template.
-
Name your template and add any optional notes.
-
Save it. It will now be available for quick selection in the task creation dropdown.
Task Summary Notifications
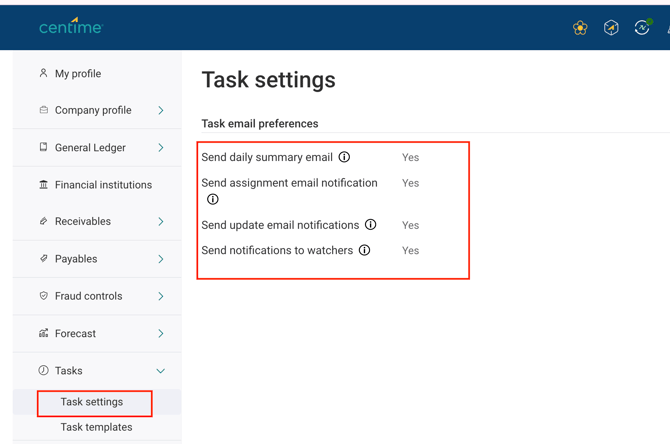
Users can manage their task-related email notifications under Settings > Tasks > Task Settings. Notification preferences include:
-
✅ Send daily summary email
-
📩 Send assignment email notification
-
🔄 Send update email notifications
- 🔄 Send notifications to Watchers
Each option can be individually enabled or disabled based on user preference.